Editor Quality Selector
Scene and layered-scene toolbars have a Quality dropdown. It previews the game at a quality preset while you edit, and opens the Quality Settings panel for changing single rendering settings on top of a preset. The dropdown reads, for example, Quality High, or Quality Custom (High +3) while three settings differ from High.
The Quality menu in the scene's menu bar was removed in 0.12, because it did not work. Everything it offered is in the toolbar dropdown.
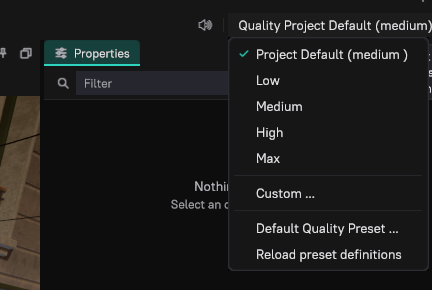
The Quality dropdown
| Entry | What it does |
|---|---|
| Project Default, the engine tiers and the project's presets | Previews that preset. Project presets come from <project>/RuntimeConfigs/QualityPresets.ddl. Selecting a preset clears any custom changes. |
| Custom... | Opens the Quality Settings panel. While changes exist, it reads Custom (High +3)... with the base preset and the number of changes, and is checked. |
| Default Quality Preset... | Picks the project's default preset. This writes the project preset file atomically and reloads the definitions. |
| Reload preset definitions | Reads the preset files again, for example after editing them in a text editor. |
Next to the dropdown, Restart renderer restarts the engine process. It is needed when the engine process stopped, or when the chosen settings include ones that only apply at startup.
Previews are an editor preference
The active preview, including custom changes, is a local, per-project editor preference stored in your user project preferences. It never overwrites player settings, because an editor preview uses an empty project identifier and is treated as transient (see Project setup and storage). The engine process starts on the stored choice.
Selectors synchronize through engine replies, and editing the preset file on disk reloads the project definitions. If a previewed preset is removed from the file, the preview falls back to the project default.
Quality Settings panel
Quality › Custom... opens the Quality Settings panel. It lists about 160 rendering settings in groups, such as Global illumination, Diffuse: screen probes, Diffuse: radiance cascades, Diffuse: path tracing, Specular, Ambient occlusion, Direct lighting, Shadows, Volumetrics, Image, Camera effects, Geometry and Streaming. The technique choices (for example the GI diffuse and specular modes, virtual shadow maps, the anti-aliasing mode, or texture streaming) come first in their group.
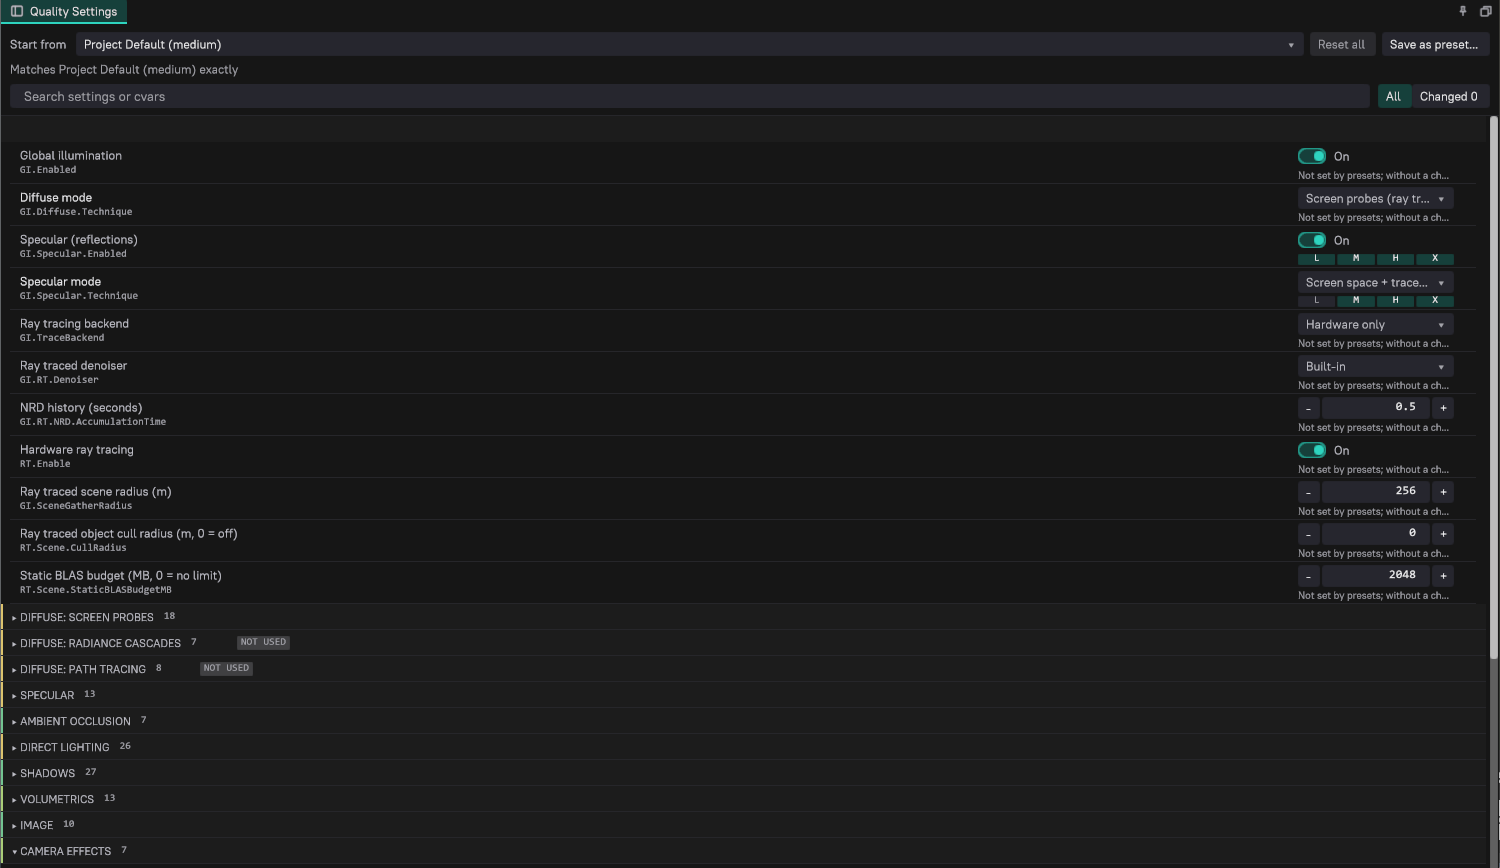
Change settings
- Choose the preset your changes apply to in Start from. When you switch it, your changes stay, but changes that match the new preset drop off.
- Change a setting with its toggle, choice list or number field. The change applies to the editor's engine process after a short pause. A value equal to the base value removes the change.
- Under each setting that presets control, a strip labelled L, M, H and X shows the Low, Medium, High and Max values. The base preset's tier is highlighted, and the tier that matches the current value is filled. Click a tier to use its value.
- Use the reset button next to a changed setting to return it to the base value, or Reset all to remove every change.
The search box (Search settings or cvars) matches setting names and CVar names. All and Changed filter the list. Each group header shows how many of its settings are changed.
Each row shows the setting's name with its CVar below it. Settings that presets do not control show Not set by presets and their value without a change. Badges and notes explain special cases:
| Indicator | Meaning |
|---|---|
| NOT USED on a group | The current modes do not use these settings, for example the radiance cascades group while the diffuse mode is screen probes. You can still change them; they apply once the mode is selected. |
| RESTART | The setting only takes effect after Restart renderer. The summary at the top also asks for a restart. |
| SCENE | A post process volume in the scene currently sets this CVar. Your value applies when the volume stops overriding it. |
| Something else sets it | The render pipeline or another system holds a different value. |
| Locked by a session preset or the command line | The value is fixed for this session and cannot be changed here. |
The status row at the bottom shows the number of changes on the base preset and reminds you that the panel is an Editor preview only. While a scene is playing, the panel shows its values but cannot change them.
Save as preset
Save as preset... writes the base preset plus your changes into the project's RuntimeConfigs/QualityPresets.ddl as a preset of its own, so the game and other team members can use it. The suggested name is the base preset's name with "(custom)". The name custom is reserved, and the engine presets (low, medium, high, max) cannot be replaced. Saving under the name of an existing project preset asks before replacing it.
Post process volumes and presets
Post process volumes can override CVars that presets own, such as the GI specular technique or budgets. The volume acts as a scene layer above the preset and your custom changes:
- While the camera is inside the volume, the volume's value applies.
- When the volume stops overriding the CVar, your value (from the preset or your custom change) is restored.
- A volume no longer makes the preset read as Custom. The dropdown keeps showing the preset you picked, and the panel marks the setting with SCENE.
Play, simulate and standalone
Preview changes are disabled during Play and Simulate, and the preview is applied again when the scene returns to edit mode. A standalone launch passes a transient -quality argument instead of writing anything into the player's settings.
Build-time platform profiles remain independent of quality presets.